Description
The RoCoder name is very close to that of the original Vocoders given title. However, as always with - Rob Papen - products you will find that there are many new and creative features onboard, so don’t expect a regular Vocoder!
Alongside a 32-band Vocoder, RoCoder also features an Additive mode, a combined Vocoder + Additive mode, Noise mode, Tuned Noise mode, and a Tuned Comb mode!
These new modes allow you to create many new types of sound next to the top-notch Vocoder sound!
RoCoder doesn’t stop with these new refreshing modes, it also includes stereo panning per band, and it has our well-known XY pad, an extensive modulation matrix, and all this is finished off with built-in top-notch FX including - Chorus, Flanger, Phaser, Stereo Delay, Reverb section.
RoCoder is a new muscular vocoder type of FX that opens up a whole new range of sounds! As the Borg stated whilst testing “Resistance is futile with RoCoder!”
Features:
The RoCoder Concept
Alongside the Vocoder, it has innovative other modes.
The Vocoder mode.
This is the classic Vocoder mode. RoCoder in its Vocoder mode can use up to 32 bands with a built-in carrier synthesizer.
The Additive mode.
Instead of Vocoding, the engine generates 32 bands of harmonics using sine waveforms.
The additive mode works in a similar way to the Vocoder as previously explained, however instead of a carrier signal, 32 sine waveforms are generated, their volume being that of the corresponding modulator band, so as to generate an atonal sound FX.
There is still the option for keyboard control and even polyphonic notes are possible, although due to the atonal sound, it very often sounds far from tuned. Once keyboard control is activated it still offers Envelope control and other controls like portamento available in the carrier section.
The Combined Additive and Vocoder mode.
This feature of RoCoder offers the ability to combine two modes! Keep in mind that this mode is more CPU intensive, and the atonal FX of the Additive means that ‘tuned’ usage is more difficult. Still, an interesting mode to create new unheard sounds!
The Noise mode.
In this mode, the MIDI keyboard notes are used for creating the bands. If you only play one note, let’s say A4 then only one band at a frequency of 440Hz (A4) is used. So the number of bands used depends on the number of notes you play.
In this mode, the MIDI keyboard notes are used for creating the bands. If you only play one note, let’s say A4 then only one band at a frequency of 440Hz (A4) is used. So the number of bands used depends on the number of notes you play.
The Tuned Noise mode.
In this mode, the MIDI keyboard note is used for creating the bands. So, if you play only one note, let’s say A4 then only one band at a frequency of 440Hz (A4) is used. So, the number of bands used depends on the number of notes you play.
To increase the Tuned Noise bands, we have added special play modes inside the carrier which increases the notes by adding octave notes and 5th notes. This generates more usable sounds, due to the increased Tuned Noise bands playing.
TIP: on vocal sounds, this mode doesn’t work so well, however, it is very good on other rhythmic types of sound such as sequenced sounds, drums, and percussive types of sounds.
The Tuned Comb mode.
In this mode, the MIDI keyboard notes are used for creating the Comb Filter bands. So, if you play only one note, let’s say A4 then only one Comb Filter band at a frequency of 440Hz (A4) is used. So, depending on the number of notes you play, the number of Comb Filter bands are playing.
To increase the Comb Filters, we have added special play modes inside the carrier which increases the notes by adding octave notes and 5th notes. This generates more usable sounds, due to the increased Comb Filter bands playing.
TIP: on vocal sounds, this mode doesn’t work so well, however, it is very good on other rhythmic types of sound such as sequenced sounds, drums, and percussive types of sounds.
The Vocoder Input Carrier mode.
Essentially this mode is very similar to the other Vocoder mode, but with this difference that the built-in carrier synthesizer is not used, and instead of this the ‘side audio input’ is the carrier.
The top GUI section of RoCoder
In the top section part of RoCoder there are multiple features including selecting Presets and Banks.
Preset
Menu box to select Presets included the Quick Browser, Recently Browsed, and, Favorites features.
Bank
Menu box to select different bank folders, included the feature to create a new bank folder.
Edit / Orig
As soon as you start editing a Preset (i.e. change controls in RoCoder), the Edit button will light up. If you click on the Orig button it will return the Preset to its original settings.
ECS (External MIDI Control)
RoCoder can modify its sound parameters dynamically in response to MIDI messages received from an external controller. The assignment of external MIDI Messages to RoCoder controls is stored in the ECS
Help
Opens up RoCoder’s PDF Manual (this file).
Bypass
Bypasses RoCoder, so you will only hear the dry signal.
Bank Manager
Opens RoCoder’s Bank Manager page.
Dry Volume / Mute
Controls the dry output volume of RoCoder, being the original modulator sound. Pressing the 'Mute' button mutes the dry output volume of RoCoder.
Wet Volume / Mute
Controls the wet output volume of RoCoder, this is the Vocoder + FX sound. Pressing the 'Mute' button mutes the wet output volume of RoCoder.
RoCoder Logo
Clicking on the RoCoder logo takes you to the Back Panel. The Back Panel shows global settings and infrequently accessed controls.
Control Menu
Clicking on the Control Menu icon will bring up the Control Menu, where you can set the screen size, set how RoCoder reacts to MIDI, its current version, and other options like deactivating the animated dials.
RoCoder Modes
The way RoCoder works is set by selecting the RoCoder modes, being Vocoder, Additive, Vocoder+Additive, Noise, Tuned Noise, Tuned Comb, and Vocoder Input Carrier.
Once a mode has been selected various parts in the middle main section will change in function and in the case that some functions are not available, these will be appearing grayed out.
Vocoder Mode
Vocoder Modulator Envelope Controls are Attack, Hold, and Decay.
Vocoder Band Modulator controls are Center, Bandwidth, and Spread.
Lock Bands feature available (lock with Carrier)
Vocoder Carrier Controls are Center, Bandwidth, and Spread
Additive Mode
In Additive Mode, instead of Vocoding, the engine generates 32 bands of harmonics using sinus waves.
Additive Envelope Follower controls are Attack, Hold, and Decay.
Additional keyboard control available. Once the ‘keyboard tracking’ is selected the ‘Center’ function, changes into ‘Base’ note and the bands are formed above this ‘Base’ note.
Vocoder and Additive Mode
This feature of RoCoder offers to combine both modes.
The Volume Envelope parameters, Attack, Hold, and Decay is shared.
The Vocoder Band controls are Center, Bandwith, and Spread.
The Additive Band controls are Center, Bandwith, and Spread.
Lock Bands feature is available (lock Vocoder with Additive)
Default keyboard controlled.
Carrier synthesizer shares the Band setting with the Additive mode.
Mix control available to mix between the Vocoder and Additive sound generated.
Noise Mode
In this Vocoder mode, the carrier is noise and no MIDI keyboard control is needed. Since it is noise as a carrier, there is of course no tonal aspect in the mode.
The Modulator Envelope Follower controls are, Attack, Hold, and Decay.
The Modulator Band controls are Center, Bandwidth, and Spread.
Lock Bands feature is available (lock the modulator with the Noise carrier)
The Noise carrier controls are Center, Bandwidth, Spread, and Noise Color.
Tuned Noise Mode
In this mode, the MIDI keyboard notes are used for creating the bands. So, if you play only one note, let’s say A4 then only one band at a frequency of 440Hz (A4) is used. So the number of bands used depending on the number of notes you play.
The Modulator Envelope Follower controls are. Attack, Hold, and Decay,
The Note Band controls are Shift, Bandwidth, and Chord mode.
The Noise Carrier controls are Shift, Bandwith, and Noise Color.
Tuned Comb Mode
In this mode, the MIDI keyboard notes are used for creating the Comb Filter bands. So, if you play only one note, let’s say A4 then only one Comb Filter band at a frequency of 440Hz (A4) is used. So, depending on the number of notes you play, that number of Comb Filter bands are playing.
The Modulator controls are Shift, Bandwidth, and Chord mode.
The Comb Filter controls are, Shift, Amount, and Comb - or Comb+.
Vocoder Input Carrier
Essentially this mode is very similar to the other Vocoder mode, but with this difference that the built-in carrier synthesizer is not used, and instead of this the ‘side audio input’ is the carrier.
So the first stereo input into RoCoder is used as the Modulator signal, the second (side) input into Rocoder is used as the Carrier signal, allowing you to Vocoder any two signals together.
The Vocoder Envelope Follower controls are Atack, Hold, and Decay.
The Vocoder Band controls are Center, Bandwidth, Spread, and Lock Bands
The Input Carrier controls are, Center, Bandwidth, Spread
Additional RoCoder controls
Mono
When this is turned on any input into RoCoder is mono, so the left & right channels will be the same.
Band Edit Section
Here you can select of what type of parameters you like to edit of the bands, depending on the RoCoder mode. The graphic edit field appears in the mid-lower section.
The controls are not available in the “Noise” or “Comb Filter” modes, instead, the notes played are displayed.
The range of parameters are Volume, Pan, Mod Shift, Car Shifts
Mid-Lower Section Of RoCoder
Below the graphic band control display, you can select different pages using the buttons ‘WAVE- 3D’, ‘XY’, ‘Carrier’, ‘MOD’, ‘GROUP’, and ‘FX’.
In this section, you can control the other essential parameters of RoCoder and if you are finished with creating your sound, you can select the ‘WAVE-3D’ page, to have a nice graphic animation of the RoCoder sound :D
The XY pad is not visual once the ‘carrier’ page is selected, due to the many controls of this part.
On the right-hand side is the Filter section and some controls of the FX section. These parts are always visual, advancing the workflow. If you like to do deep FX editing, for example of the Reverb or Delay, you can select the edit page on the left-hand side.
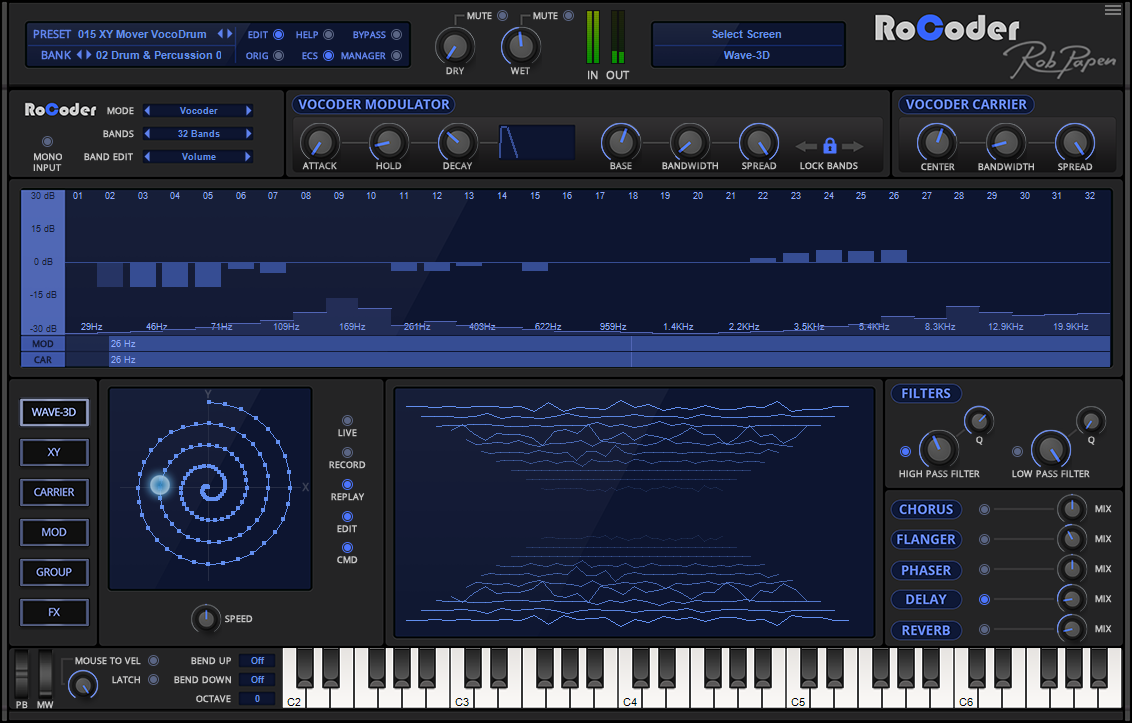
WAVE-3D Section
Once you are finished with creating your sound, you can select the ‘WAVE-3D’ page, to have a nice graphic animation of the RoCoder sound :D
This page is the default start-up page of RoCoder
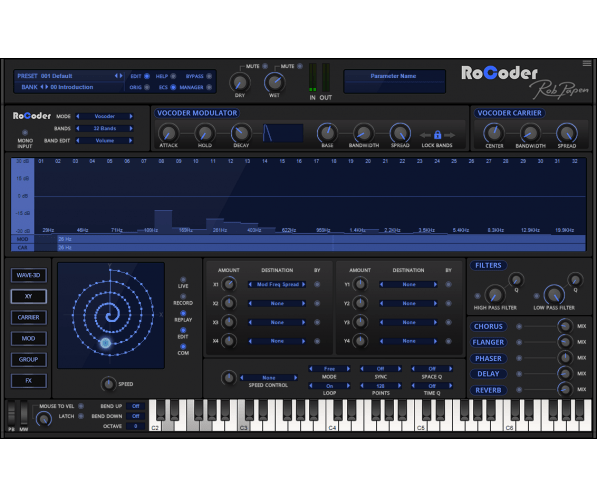
XY PAD Section
The XY pad is a combination of a live, interactive control, and automated programmable modulation source.
You can use the mouse to control the 8 parameters simultaneously, by moving the XY dot around the XY Pad.
It is also possible to record these movements as paths and use the XY pad as a programmable two-dimensional LFO.
XY Controls
Live
In this mode, the mouse or external MIDI controller is used to move the dot around over the XY Field.
Record
Use this mode to record the movement in the XY field. Once you did your movement, select ‘replay’ to have the movement play automatically according to the other settings available in the XY section.
Replay
This mode plays back to have the movement recorded according to the other settings available in the XY section.
Edit
The Edit button located near the XY pad puts the XY path in edit mode. While in edit mode, you can move the path's points around and thus edit the XY Path manually.
Speed
The Play Speed control alters the playback speed of the recorded XY Path in percentage. On the neutral position (100%) , the speed is from the recorded XY movement or the (tempo) SYNC setting.
Speed Control
The Speed parameter can be controlled by a modulation source or a MIDI controller. For example, you could use the ‘Pitch Bend’ to change the Speed parameter. There is an amount dial to control how much the controlling part changes the speed.
XY Play Modes
Once ‘Replay’ is active, the XY pad operates in Free, MIDI Mono, MIDI Poly, or Follower mode. The mode setting determines how the XY responds.
Free - In Free mode the XY Path is looped automatically. If you are using a sequencer the XY Free is reset when you restart the sequencer
MIDI Mono - All notes played by MIDI share the same XY path, but the XY path is reset with every new key you play.
MIDI Poly - Each MDI note you play starts its own XY path and each path starts from its initial position.
The XY path is free running, so it is not reset when you play a key, and all the notes share the same XY path. In Free mode the XY Path is looped automatically.
Follower - The XY movement is triggered by the Follower, once the Follower volume is above the Follower Trigger amount then the XY is triggered.
The following controls only apply if 'Replay' is activated in the XY Section.
Loop
When Loop is On, the XY dot will jump from the end of the path, back to the start of the path, and keep moving. In the < > mode, the XY path loops but travels back and forth along the path. When Loop is Off it travels the XY path one-way only once.
Sync to
By default, when the XY path is replayed, it plays back at the speed with which it was recorded. However, if you want to alter this, the Sync To menu enables you to set the time period the XY path takes to playback. This is set in quarter-beats and is synced to the host's tempo.
Points
Paths are stored as 128 points and the in-between connections. You can change the number of points stored, using the Points menu. The minimum number of points is 4 points, suitable for very straightforward paths. If you return the resolution back to 128 points (Off), the original points will be restored.
Space Quantization
Space Quantize restricts the points in the current path to a set of grid lines. The default setting is off, but when you select a grid of 32, 16, 8, or 4 grid lines, Go2 will snap all the points to their nearest grid point. The Quantize setting is non-destructive. Disabling Space Quantize will return the points back to their original position.
Time Quantization
Time Quantize sets the update frequency of the XY position. Use this in conjunction with the Sync function to find the optimized balance between update frequency and a number of points in the path.
Commands
The menu button allows different additional features of the XY section included the option of saving and loading the XY line-up.
X and Y Destination 1 – 4
In this menu, you can select which of the RoCoder's parameters will be altered by movement in the X (horizontal), and Y (vertical) direction in the XY Pad.
X and Y Amount 1 - 4
This controls how much the selected parameter will be altered by movement in the X (horizontal), and Y (vertical) direction in the XY Pad, the amount can be positive or negative.
X and Y Bypass 1 - 4
To hear the difference between modulation and no modulation you can use the bypass button to turn on / off the X, or Y modulation.
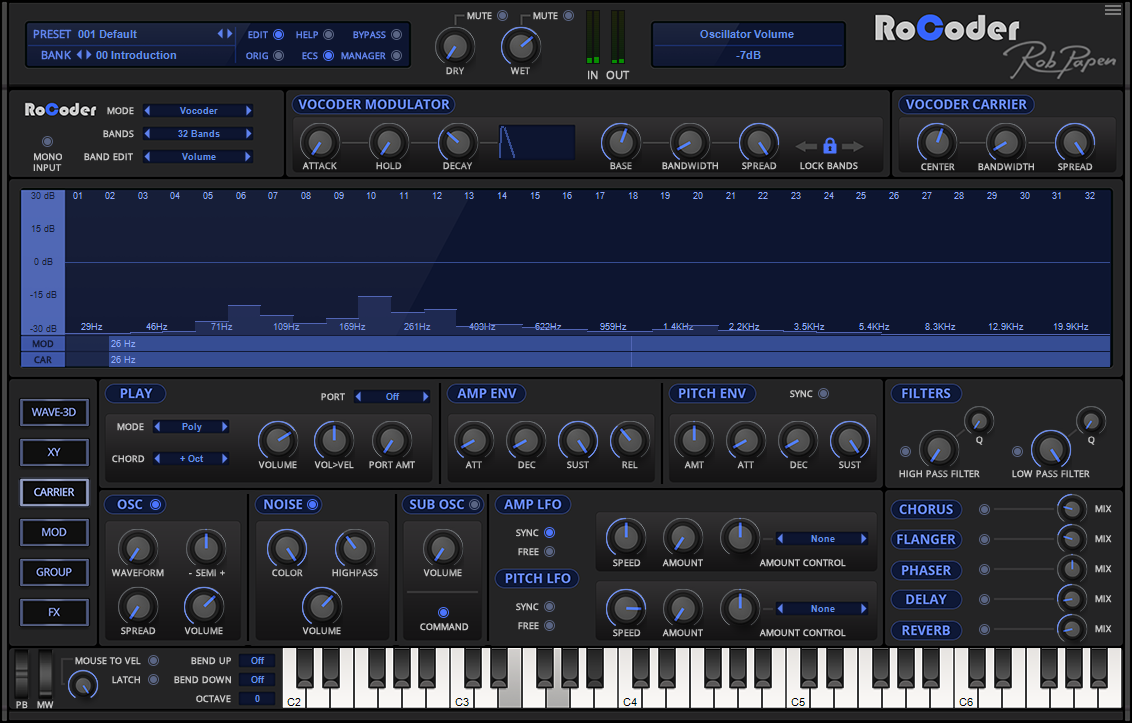
Carrier Synthesizer Section
The Carrier Synthesizer of RoCoder is an essential part in creating the Vocoder sound.
This fully-featured 16 voice synthesizer, creates the full harmonic sound, which is needed for the Vocoder signal, by using a mix of Saw and Square waveforms, which can be expended by using the “Oscillator Spread” to creates a 3-Oscillator sound with detuning spreading. To further expand on the harmonic content, a Noise Oscillator and Sub-Oscillator modules, which generate noise or a square sub-wave respectively, are available as well.
The Carrier Synthesizer is used during the Vocoder mode and Vocoder+Additive mode of RoCoder.
In the ‘Additive’, ‘Tuned Noise’, and ‘Tuned Comb’ mode parts of the carrier section are also used for controlling and adjusting parameters.
Play section
This section controls how the carrier synth plays, either monophonic or polyphonic, with chord modes and portamento mode & speed. Also, the volume of the carrier and velocity influence on volume is controlled here as well. The play section and its features are used in several of RoCoder modes such as the ‘Additive’ mode if the keyboard is activated, and the ‘Tuned Noise’, &‘Tuned Comb’ modes.
Modes
Poly, Mono, and Legato.
Chord
The name of this feature might be a bit confusing since there are actually additional notes playing in the mode. For example, if you hit a note, that it plays an extra note one octave higher as well.
The available combinations are always octaves and fifth notes, so no major, minor, etc chords are generated.
The different modes can be used inside the different modes and especially with the ‘Tuned Noise’ and ‘Tuned Comb’ modes, they can be useful in creating more bands since in these modes, the notes you play are the bands created. So for example, if you play one note with the ‘Tuned Noise’, just one band is created but using the chord feature multiple notes/bands are created even with a single note.
Volume
This controls the volume of the carrier synthesizer or in the case of other modes, the volume of the ‘Additive’, ‘Tuned Noise’, or ‘Tuned Comb’ sound.
Velocity > Volume
This controls how much the velocity controls the volume of the carrier synthesizer or in the case of other modes, the volume of the ‘Additive’, ‘Tuned Noise’, or ‘Tuned Comb’ sound.
Portamento modes.
Off - No portamento.
Constant Rate - The note pitch changes at a constant rate from one note to the next. Greater keyboard note ranges take a longer time.
Constant Time - The note pitch changes between notes always take the same time, regardless of note range.
Held Rate - Held Rate works as Constant Rate, but only affects overlapping notes (legato style).
Held Time - Held Time works the same as Constant Time, but only affects overlapping notes (legato style).
Portamento Amount - This control sets the rate or time for the Portamento effect.
Amp ENV (Volume Envelope)
The Volume Envelope determines the volume contour of the carrier sound or some of the other modes its volume contour shape.
Controls are Attack, Decay, Sustain, and Release
Pitch Envelope
The Pitch Envelope section is responsible for pitch glides controlled by an Envelope.
Controls are Attack, Decay, Sustain, Release and Amount control with a range of -24 semi up to 24 semi.
Oscillator (carrier)
The oscillator section is the heart of the carrier once the ‘Vocoder’ or ‘Vocoder+Additive’ mode is active, it is used to generate the harmonic content of the carrier sound.
Due to the working of the carrier, we only offer the Saw and Square waveforms, since the carrier needs lots of harmonics to do its job, but you can mix between these two types of waveforms.
The Controls are
On/Off
This allows using for example only the ‘Noise’ or/and only the ‘Sub-Oscillator’ of the Carrier synthesizer.
For example, if you like the ‘Noise’ mode, but miss the keyboard control of it, you can use only the ‘Noise’ part of the ‘Carrier’ synthesizer.
Waveform
Here you can mix between the ‘Saw’ waveform or the ‘Square’ waveform.
These two waveforms or a mix between them generate the harmonic content needed for creating a solid carrier sound.
Semi
This controls allows you to transpose the Oscillator section in semi notes, with a range from -36 semi-tones up to +36 semi-tones.
Spread
If the spread setting is set to 0% the ‘Carrier’ synthesizer uses one oscillator. Once spread is above 0%, the ‘Carrier’ synthesizer generates a three oscillator sound, generating swirly fuller sound. The 'Spread' amount controls the detuning of two of these oscillators, one being tuned down and the other being tuned up.
NOISE (Noise Oscillator)
The Noise Oscillator is a great addition to the carrier. Especially if the noise color is set to ‘White Noise’ it can generate a useful sound and is a cool addition to the Vocoder. The additional ‘High Pass Filter’ allows to cut out lower frequencies and removes ‘hiss’ from the Vocoder sound.
On/Off
This allows you to turn on or off, the ‘Noise Synthesizer’ and can be handy to hear the difference between using it and not using it, instead of turning the ‘Volume’ up and down.
Color
This mixes between ‘Pink Noise’ and ‘White Noise’ as noise source. In general the ‘White Noise’ is more effective with the Vocoder.
High Pass
This ‘High Pass Filter’ allows you to cut off low frequencies from the ‘Noise Oscillator’ which comes in handy especially if you use the ‘White Noise’ color and like to create a high ‘hiss’ sound for the vocoder.
Volume
The volume of Noise from -40dB (off) to +10db
SUB-OSC (Sub-Oscillator)
This generates a ‘Square wave’ one octave below the main ‘Oscillator’ pitch. There is no detuning feature since it is connected to the main ‘Oscillator’.
On/Off
This allows you to activate the ‘Sub-Oscillator and can be handy to hear the difference between using it and not using it, instead of turning the ‘Volume’ up and down.
Note that it is possible to have the ‘Sub-Oscillator’ active, without having the ‘Oscillator’ and ‘Noise’ active, or to have it active with the ‘Noise’ active as well.
Volume
This controls the volume of the ‘Sub-Oscillator’ from -40dB (off) to +10dB.
AMP LFO
This section creates volume modulation for creating tremolo FX.
In the ‘Additive’, ‘Tuned Noise’, and ‘Tuned Comb’ mode the ‘AMP LFO’ is also available for creating this tremolo FX on the other types of sounds.
Speed & SYNC
This sets the Speed of the LFO, controlling the speed of the tremolo FX. When Sync is turned on the speed is synced to the host's tempo.
In non-sync mode, the tempo goes from 0.03hz up to 27.5kHz
In tempo sync mode, the speed setting goes from 1/32 triple note speed up to 1/16 triple note speed.
Amount
This controls the amount of tremolo FX generated.
Amount Control
It is possible to control the amount of tremolo by using another RoCoder modulator, or one of the many MIDI controllers.
Pitch LFO
This section creates pitch vibrato modulation.
In the ‘Additive’, ‘Tuned Noise’, and ‘Tuned Comb’ mode the ‘Pitch LFO’ is also available for creating this vibrato FX on the other types of sounds.
Speed & Sync
This sets the speed of the LFO, controlling the speed of the pitch vibrato. When Sync is turned on the speed is synced to the host's tempo.
In non-sync mode, the tempo goes from 0.03hz up to 27.5kHz.
In tempo sync mode, the speed setting goes from 1/32 triple note speed up to 1/16 triple note speed.
Amount
This controls the amount of pitch vibrato generated.
Amount Control
It is possible to control the amount of pitch vibrato by using other RoCoder modulators, or one of the many MIDI controllers.
Command (MENU BUTTON)
This allows you for example to save a setting you created with the carrier synthesizer to disk and to be used in another RoCoder preset.
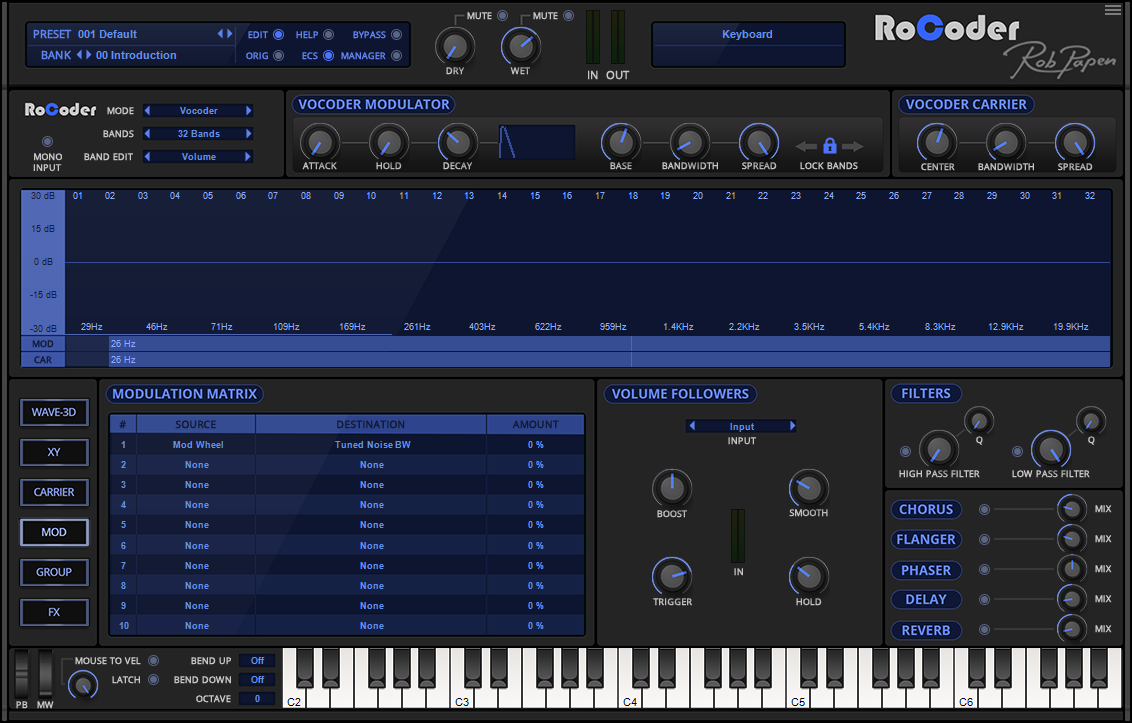
MOD (Mod Matrix / Volume Follower)
The modulation matrix allows to controls almost all of RoCoder parameters via either MIDI Sources (such as Mod Wheel) or Modulation Sources (such as the XY position).
In case you used all the XY destinations in the XY page, you can use this as well!
Also an ‘Audio Follower’ which allows you to control RoCoder's parameters with, for instance, the extra audio side input.
Modulation slots 1-10
In total there are 10 slots available and clicking on the ‘Slot’ number allows you to ‘bypass’ the modulation connection, which is a handy feature to hear the difference between modulation or without the modulation without the needing to change the amount.
Modulation Source
Here you select one of the many MIDI or RoCoder's internal modulation sources.
Modulation Destination
Here you select one of RoCoder’s destinations.
Modulation Amount Control
This controls the amount of modulation, the amount can be either negative or positive.
VOLUME FOLLOWER MODULATION SOURCE
This ‘Volume Follower’ allows you to use audio as a modulation source. The Audio can be the regular ‘input’, ‘Side Input’, ‘Modulator’, ‘Carrier’, ‘Vocoder’, or the ‘Output’.
The Volume follower can be adjusted by using the ‘Smooth’, ‘Hold’, and the ‘Trigger’ controls.
Input menu
Here you select the audio source to be used as modulating source.
Input - The regular audio input
Side Input - The additional audio input, also very often called side input
Modulator - This is the audio output from the Modulator section.
Carrier - This is the audio output from the Carrier section.
Vocoder- This is the audio of the vocoder (if active)
Output - This is the final audio output after the FXs.
Boost
This increased the audio input signal in case the signal is not loud enough.
Smooth
This smooths the audio so it is a more fluid modulation source
Trigger
This sets the Trigger volume level, at which the audio starts creating the modulation source signal, below this amount the modulation source signal is zero.
Hold
This sets how long the audio can be active, even if it goes below the trigger level.
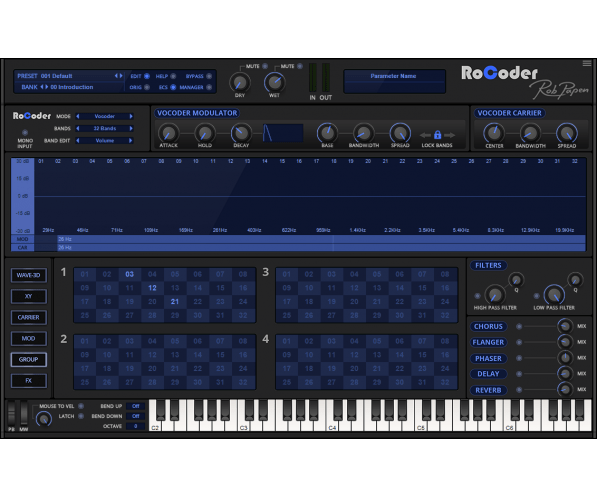
GROUP
This section allows to create of up to 4 groups of selected bands.
If you ‘Vocoder’, ‘Additive’, ‘Vocoder+Additive’, or ‘Noise’ mode, this section can then be used to select a selection of bands that can be modulated as group by the ‘XY Pad’ or ‘Modulation Matrix’.
In total 4 groups of selected bands are available, these are shown in the 4 group sections (1 to 4). To select a band for that group, click on the band's number, i.e. in Group 1 clicking on 4 will select band 4 as part of Group 1.
FILTER
After the different modes of RoCoder (such as Vocoder, Additive or any of the other modes), the audio can then go into the Filter section.
This uses both a 12dB High-Pass Filter and a 12dB Low-Pass Filter with Resonance (Q) control.
This section increases the options for creating exciting sounds. For example, if you use a drumloop as a modulator inside the Vocoder mode, you can use the High-Pass Filter dynamical by using the XY or the ‘Volume Follower’!
HIGH-PASS FILTER
High frequencies pass through this Filter; those below the Cutoff frequency are reduced by 12dB per octave.
High-Pass Filter On/Off
This allows you to turn on / off the High-Pass Filter and comes in handy if you like to hear the difference with or without the High-Pass Filter.
High-Pass Filter Cutoff
This controls the frequency of the High-Pass Filter, frequencies below the Cutoff frequency are reduced by 12dB per octave.
High-Pass Q (Resonance)
Q is the resonance level of the High-Pass Filter. Resonance emphasizes frequencies around the Cutoff frequency and creates a peak in the frequency spectrum. As you increase the Resonance, the effect becomes more pronounced until the Filter almost self-oscillates
LOW-PASS FILTER
Low frequencies pass through this Filter; those above the Cutoff frequency are reduced by 12dB per octave.
Low-Pass Filter On/Off
This allows to turn on / off the Low-Pass Filter and comes in handy if you like to hear the difference with Filter or without Filter.
Low-Pass Filter Cutoff
This controls the frequency of the Low-Pass Filter; frequencies above the Cutoff frequency are reduced by 12dB per octave.
Low-Pass Q (Resonance)
Q is the resonance level of the Low-Pass Filter. Resonance emphasizes frequencies around the Cutoff frequency and creates a peak in the frequency spectrum. As you increase the Resonance, the effect becomes more pronounced until the Filter almost self-oscillates.
FX (Right-hand Side)
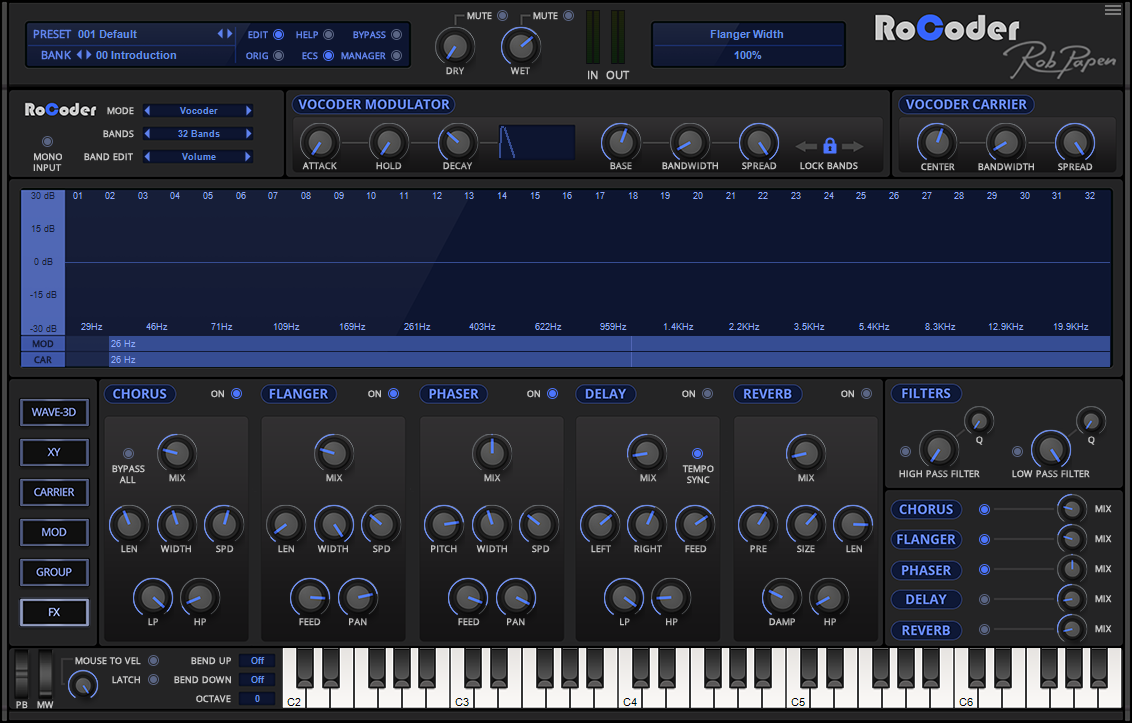
RoCoder has several high-quality FX built-in, to further alter the sound, they are Chorus, Flanger, Phaser, Delay & Reverb, the signal passing through them in that order.
The FX section of RoCoder, with a limited amount of controls, always appears on the right-hand side of the middle section, below the Filter section. Here you can turn on / off & alter the mix of the various FXs.
To editing this FX in detail, you can select the ‘FX’ edit page on the left-hand side.
FX (Edit page)
Bypass All (button)
This button bypasses all FXs (Chorus, Flanger, Phaser, Delay, and Reverb) by setting them into their bypass mode. This can helps you to hear the difference between the dry sound and the sound with all the active FX.
CHORUS
With Length, Width, Speed, LP Filter, HP Filter, and Mix control.
FLANGER
With Length, Width, Speed, Feedback, Pan Mod, and Mix control.
PHASER
With Pitch, Feedback, Width, Speed, Pan Mod, and Mix control.
DELAY (MONO/STEREO)
With Left Delay, Right Delay, Sync, Feedback, LP Filter, HP Filter, and Mix control.
REVERB
With Pre-Delay, Size, Length, Damp, HP Filter, and Mix control.
VIRTUAL KEYBOARD
At the bottom of RoCoder is a virtual keyboard that can be used to trigger the Oscillator (you can also trigger the oscillator via MIDI note input).
On the left-hand side is a virtual MIDI Modulation Wheel & Pitch Bend Wheel.
or the Pitch Bend Wheel, the amount of pitch bend is determined by the “Bend Up” and “Bend Down” menu.
Octave
Octave showed in the Virtual keyboard, from -4 octave to +4 octave around MIDI Note 48 (C2).
Velocity / Mouse To Velocity
The velocity of the note played, if “Mouse to Velocity” is turned on the mouse position on the keyboard changes the velocity.
Latch
When it's on it latches the notes played, so when it's on, when you release the mouse click then the note is not released. If Latch is on and then you turned it off, it releases all the notes.
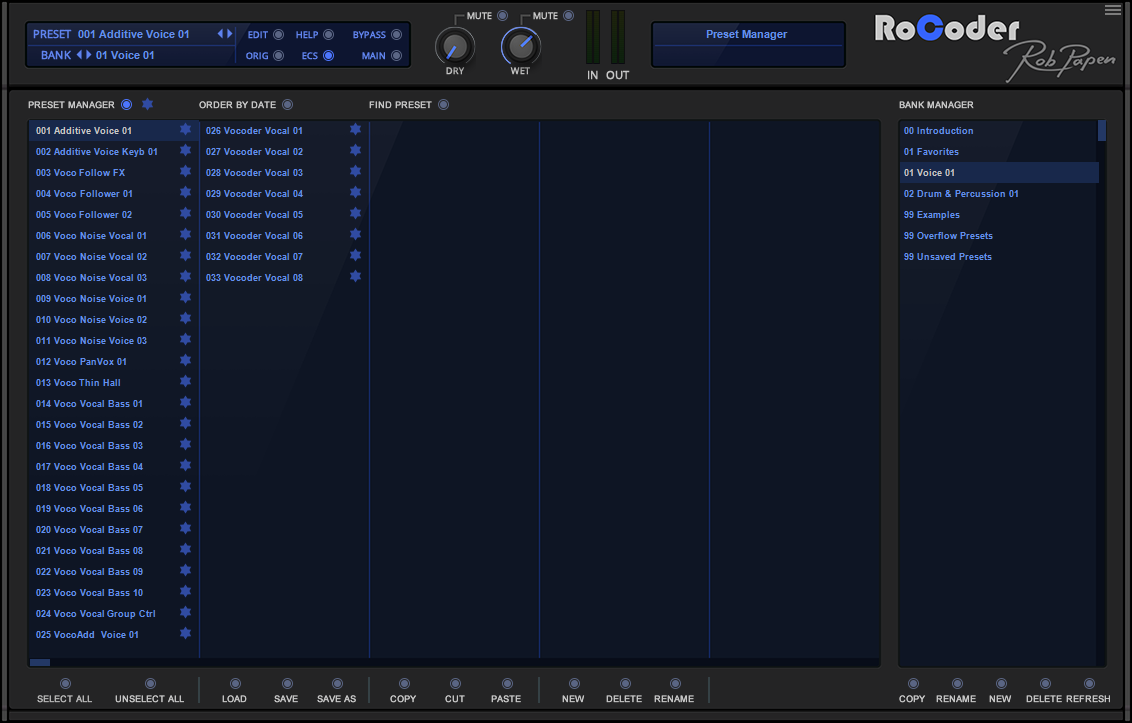
BANK MANAGER
In the Manager Section, you find and organize your Presets and Banks.
BACK PANEL
A click on the logo switches the plug-in to its back panel. The back panel contains program information and several global settings.
MIDI Channel
Omni or channel 1-16.
Computer Keyboard on/off
Change preset by using the up and down arrows of the computer keyboard.
MIDI Preset Change on/off
Program change by MIDI can be ignored by RoCoder.
MIDI Bank Change on/off
Bank change by MIDI can be ignored by RoCoder
Bar Response Time
Graphic bars on the front page can respond in different time settings.
Screen options
There are multiple GUI screen size options. 100%, 150% and 200% size.
A4 tune
Sets the base pitch for RoCoder, normally it is set at 440Hz.
Tuning scales
It is possible to work with alternative tuning scales.
COMPATIBILITY
- PC: 32 & 64 bits VST, VST3, and 64 bits AAX for Windows 7/8/10/11
- (Note: PC AAX for PT 12 or higher)
- Mac: 64 bits AU, VST, VST3, and AAX, for OS-X 10.12 - 11 (Big Sur)
- Serial/license system with activation whilst registering the product
- The activation system is offline, which means that there is no direct connection between the plugin and the robpapen.com homepage.
- The software can be installed on 2 of your own computer systems.

